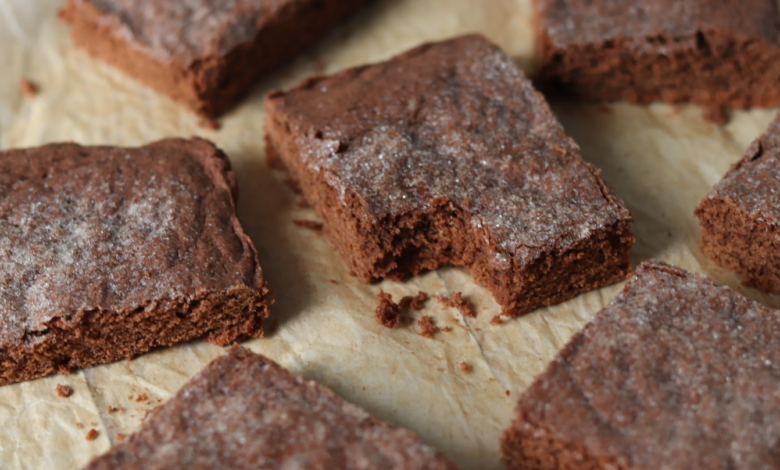
Chocolate Concrete: The Nostalgic Treat You Can’t Resist

If you grew up in the UK, the name “chocolate concrete” probably brings back a wave of fond memories from school lunches and childhood treats. This delightful, no-bake dessert, also known as “chocolate crunch,” combines simple ingredients to create a chewy, chocolatey slice that is utterly irresistible. Whether you’re looking to relive those childhood memories or introduce this classic treat to a new generation, this chocolate concrete recipe is sure to be a hit!
What is Chocolate Concrete?
Chocolate concrete is a deliciously rich dessert made from crushed biscuits, cocoa powder, and butter, creating a sweet, crumbly, and chocolatey slab. Often served in schools, this treat was loved by kids for its simple ingredients and easy preparation. It can be enjoyed on its own or with a drizzle of chocolate sauce or a scoop of ice cream, making it versatile for any occasion.
Why You’ll Love Chocolate Concrete
- Easy to Make: With minimal preparation and no baking required, chocolate concrete is perfect for those who want a quick and satisfying dessert.
- Versatile Treat: You can enjoy it as is or customize it with different toppings like sprinkles, nuts, or marshmallows.
- Kid-Friendly: This dessert is a fun way to get kids involved in the kitchen, allowing them to help mix and crush the ingredients.
- Deliciously Indulgent: The combination of chocolate and buttery biscuits creates a flavor that is hard to resist.
Chocolate Concrete Recipe
Ingredients:
- 250g (9 oz) digestive biscuits (or any plain biscuits)
- 100g (3.5 oz) unsweetened cocoa powder
- 125g (4.4 oz) unsalted butter
- 200g (7 oz) granulated sugar
- 1 tsp vanilla extract
- Optional: chocolate chips, nuts, or mini marshmallows for topping
Instructions:
- Prepare the Biscuit Base: Start by crushing the digestive biscuits into fine crumbs. You can do this using a rolling pin or food processor. Set aside.
- Melt the Butter: In a saucepan over low heat, melt the unsalted butter. Once melted, remove from heat and allow it to cool slightly.
- Mix the Ingredients: In a large mixing bowl, combine the crushed biscuits, cocoa powder, granulated sugar, and vanilla extract. Pour in the melted butter and mix thoroughly until everything is well combined.
- Transfer to a Tin: Line a square or rectangular baking tin with parchment paper. Pour the mixture into the tin and press down firmly to create an even layer.
- Chill in the Fridge: Place the tin in the refrigerator and let it chill for at least 1-2 hours until it’s set and firm.
- Serve and Enjoy: Once set, remove the chocolate concrete from the tin and cut it into squares or rectangles. Optionally, top with chocolate chips, nuts, or mini marshmallows for extra flavor.
Frequently Asked Questions
1. Can I use different types of biscuits?
Yes! While digestive biscuits are traditional, you can experiment with other types like Hobnobs, rich tea biscuits, or even Oreos for a unique flavor.
2. How should I store chocolate concrete?
Store any leftovers in an airtight container in the refrigerator for up to a week. This dessert can also be frozen for up to 3 months. Just ensure to wrap it well.
3. Can I add additional ingredients?
Absolutely! You can mix in chocolate chips, dried fruit, or even nuts for added texture and flavor.
4. Is chocolate concrete suitable for vegetarians?
Yes, this recipe is entirely vegetarian-friendly. Just ensure that the biscuits you use do not contain any animal-derived ingredients.
5. What can I serve with chocolate concrete?
Chocolate concrete pairs well with whipped cream, vanilla ice cream, or a drizzle of chocolate sauce. It can also be served with a cup of tea or coffee for a delightful treat.
Tips for the Perfect Chocolate Concrete
- Crush the Biscuits Well: Ensure that the biscuits are finely crushed for a better texture and to hold the mixture together.
- Press Firmly: When transferring the mixture to the tin, press it down firmly to create a solid base that holds its shape.
- Chill Long Enough: Allowing it to chill for at least two hours will ensure the chocolate concrete sets properly.
Conclusion
Chocolate concrete is a delightful dessert that combines simplicity with rich flavors. Whether you’re reminiscing about school days or introducing a new generation to this classic treat, it’s a recipe that everyone will love. Quick to prepare and incredibly satisfying, chocolate concrete is sure to become a staple in your dessert repertoire. So gather your ingredients, roll up your sleeves, and treat yourself to this indulgent, no-bake delight!


