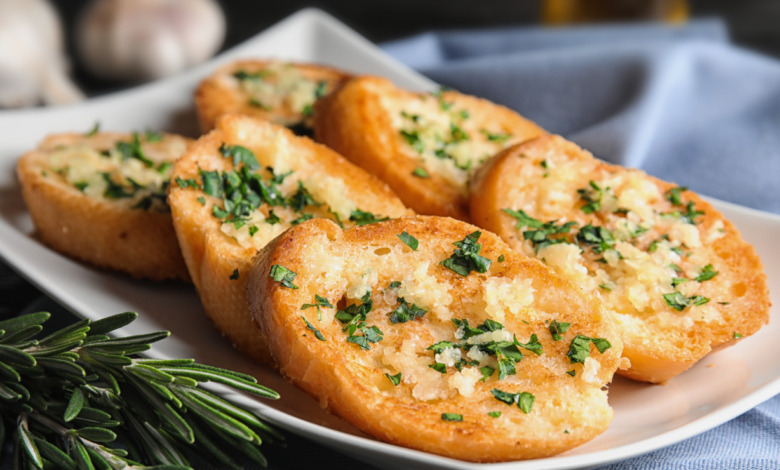
How to Make Perfect Frozen Garlic Bread in the Air Fryer: A Quick and Easy Guide

Garlic bread is a beloved side dish that pairs perfectly with pastas, soups, or salads. But sometimes, you want a quick and hassle-free way to enjoy this flavorful treat. Enter the air fryer – the kitchen appliance that has taken convenience cooking to a whole new level. If you’ve ever wondered how to make frozen garlic bread in the air fryer, you’re in for a treat. It’s fast, easy, and results in perfectly crispy and delicious garlic bread every time. In this guide, we’ll walk you through the steps to achieve garlic bread perfection using your air fryer, with some helpful tips to ensure it’s as flavorful as possible.
Why Use the Air Fryer for Garlic Bread?
The air fryer is known for its ability to cook food quickly and evenly, giving it a crispy texture without the need for excess oil. When it comes to frozen garlic bread, the air fryer is a game-changer. Here’s why:
- Crispy Texture: The air fryer creates that perfect crispy outer layer, while keeping the inside soft and flavorful.
- Speed: The air fryer cooks frozen garlic bread much faster than using a traditional oven, making it ideal for a quick snack or side dish.
- No Preheating Required: Unlike ovens, air fryers don’t require preheating, so you can save time and start cooking right away.
- Even Cooking: The air fryer circulates hot air around the food, ensuring every inch of your garlic bread gets crispy and golden.
What You’ll Need
- 1 or 2 pieces of frozen garlic bread (store-bought)
- Air fryer
- Optional: Extra butter, garlic, or herbs for added flavor
Steps to Make Frozen Garlic Bread in the Air Fryer
Step 1: Prepare the Garlic Bread
Take your frozen garlic bread out of the packaging. If the bread comes in slices, you can either cook it as is or separate the slices to fit more evenly into the air fryer basket. You don’t need to thaw the garlic bread before cooking – the air fryer will handle it straight from frozen.
If you prefer extra buttery or garlicky flavor, you can brush a little more garlic butter on top before air frying.
Step 2: Preheat the Air Fryer (Optional)
While most air fryers don’t require preheating, some models might cook more efficiently with a quick 3-5 minute preheat. If you prefer, set your air fryer to 360°F (180°C) and let it heat up. This step is optional, but it can help achieve an even crispier texture.
Step 3: Place the Garlic Bread in the Air Fryer Basket
Arrange your frozen garlic bread in a single layer in the air fryer basket. Make sure there’s enough space between each piece for the air to circulate evenly. If necessary, cut the bread into smaller pieces to fit.
Step 4: Cook the Garlic Bread
Set the air fryer to 360°F (180°C) and cook the garlic bread for 5-8 minutes. Keep an eye on it as cook times can vary depending on the thickness of the bread and the air fryer model. The garlic bread should be golden brown and crispy around the edges when done.
Step 5: Check for Doneness
Once the time is up, check the garlic bread to ensure it’s crispy and hot all the way through. If it needs a little more time, you can continue cooking for an additional 2-3 minutes until it reaches your desired level of crispiness.
Step 6: Serve and Enjoy
Once the garlic bread is cooked to perfection, remove it from the air fryer and let it cool for a minute before serving. Enjoy it as a side dish with pasta, soups, or even on its own as a snack!
Tips for Perfect Frozen Garlic Bread in the Air Fryer
- Don’t overcrowd the basket: Make sure the garlic bread pieces are in a single layer to ensure even cooking and crispiness.
- Adjust cook time based on thickness: Thicker slices may require a little extra time, while thinner slices may cook faster. Always check towards the end of cooking time to avoid overcooking.
- Add extra flavor: For an even more decadent flavor, top the garlic bread with some grated Parmesan cheese, fresh herbs (like parsley), or a drizzle of olive oil before air frying.
- Reheat leftovers: Leftover garlic bread can be reheated in the air fryer at 360°F for about 2-3 minutes to bring it back to its crispy, delicious state.
Frequently Asked Questions (FAQs)
Q1: Can I make homemade garlic bread in the air fryer? Yes, you can! Just spread garlic butter on your bread slices and follow the same steps for cooking. Preheat the air fryer to 360°F and cook for about 5-7 minutes until the bread is golden and crispy.
Q2: How can I make my frozen garlic bread extra crispy in the air fryer? To get extra crispiness, you can brush the bread with a little bit of olive oil or melted butter before air frying. This will help achieve a golden and crispy exterior.
Q3: Can I cook frozen garlic bread with cheese in the air fryer? Absolutely! You can top your frozen garlic bread with cheese before air frying. Just make sure to add the cheese in the last few minutes of cooking so it doesn’t burn.
Q4: How long can I store leftover garlic bread? Leftover garlic bread can be stored in an airtight container at room temperature for up to 2 days or refrigerated for up to 5 days. To reheat, simply place it back in the air fryer for 2-3 minutes at 360°F.
Conclusion
Making frozen garlic bread in the air fryer is a quick and easy way to enjoy this delicious snack without the hassle of using an oven. In just a few minutes, you can have crispy, golden garlic bread that’s perfect as a side dish or snack. Whether you’re enjoying a comforting bowl of pasta or serving it at a gathering, this simple method will help you achieve crispy and flavorful garlic bread every time. With a few helpful tips and tricks, you’ll be making garlic bread like a pro in no time!


