Delightful Homemade Marshmallows: The Perfect Sweet Treat for Any Occasion!
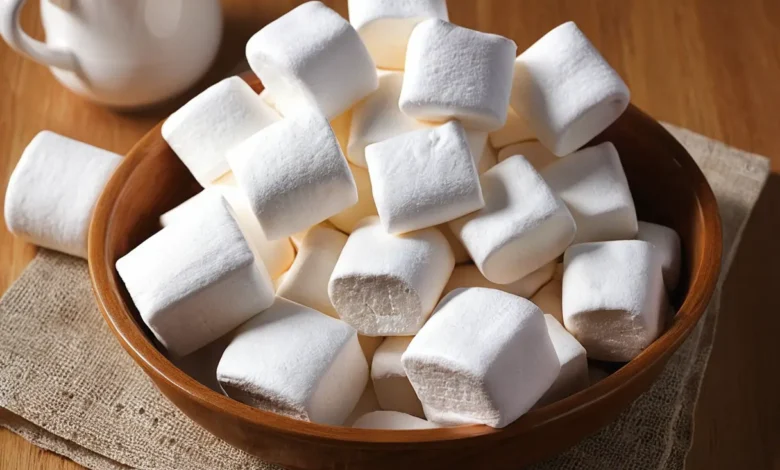
If you’re looking for a fun and delicious way to satisfy your sweet tooth, homemade marshmallows are the answer! Fluffy, sweet, and perfectly pillowy, these marshmallows can elevate your desserts, hot drinks, or even be enjoyed on their own. In this blog post, we’ll guide you through a straightforward recipe for making your own marshmallows at home, address frequently asked questions, and provide tips to ensure your marshmallows turn out perfectly every time.
What are Marshmallows?
Marshmallows are soft, spongy confections made from sugar, water, and gelatin. Traditionally enjoyed as a treat on their own, they are often used in recipes for s’mores, hot chocolate, or desserts. The light, airy texture and sweet flavor make marshmallows a favorite among kids and adults alike!
Why Make Marshmallows at Home?
Making marshmallows at home allows you to control the ingredients, avoiding artificial flavors and preservatives found in many store-bought versions. Plus, there’s something incredibly rewarding about crafting your own sweet treats! Homemade marshmallows are also a perfect gift or a fun project to share with family and friends.
Ingredients You’ll Need
To make your own marshmallows, gather the following ingredients:
- 1 cup of water (divided)
- 2 cups of granulated sugar
- 1 cup of light corn syrup
- 1 tablespoon of unflavored gelatin
- 1/4 teaspoon of salt
- 1 teaspoon of vanilla extract (or any flavoring of your choice)
- Powdered sugar and cornstarch (for dusting)
Step-by-Step Recipe for Homemade Marshmallows
- Prepare the Gelatin: In a small bowl, combine 1/2 cup of cold water with the gelatin. Let it sit for about 10 minutes to bloom.
- Cook the Sugar Mixture: In a medium saucepan, combine the remaining 1/2 cup of water, granulated sugar, corn syrup, and salt. Cook over medium heat, stirring until the sugar dissolves. Once dissolved, stop stirring and allow the mixture to boil until it reaches 240°F (115°C) on a candy thermometer.
- Combine Gelatin and Sugar Syrup: Once the sugar mixture reaches the desired temperature, remove it from heat. Carefully add the bloomed gelatin and stir until fully dissolved.
- Whip the Mixture: Pour the sugar and gelatin mixture into a stand mixer fitted with the whisk attachment. Begin whisking on low speed and gradually increase to high speed. Whip for about 10-15 minutes, or until the mixture becomes thick, glossy, and forms stiff peaks.
- Add Flavoring: Once the mixture is whipped, add the vanilla extract (or your chosen flavoring) and mix until incorporated.
- Prepare the Pan: Lightly grease a 9×13 inch baking pan with cooking spray. In a small bowl, combine powdered sugar and cornstarch, then dust the bottom of the prepared pan.
- Pour the Marshmallow Mixture: Carefully pour the whipped marshmallow mixture into the prepared pan, smoothing the top with a spatula. Dust the top with more powdered sugar and cornstarch mixture.
- Let Set: Allow the marshmallows to set at room temperature for at least 4 hours or overnight.
- Cut and Dust: Once set, dust a clean surface with powdered sugar. Turn the marshmallow slab out onto the surface and cut into desired shapes and sizes. Dust each piece with more powdered sugar to prevent sticking.
- Enjoy Your Marshmallows: Your homemade marshmallows are ready to be enjoyed! Store them in an airtight container at room temperature for up to 3 weeks.
Frequently Asked Questions about Homemade Marshmallows
- Can I use a different sweetener? While granulated sugar is the traditional choice, you can experiment with alternatives like honey or agave syrup, keeping in mind they may affect the texture.
- Are homemade marshmallows gluten-free? Yes! As long as you use gluten-free flavorings and ingredients, homemade marshmallows are naturally gluten-free.
- How can I add flavor to my marshmallows? In addition to vanilla extract, you can use almond extract, peppermint extract, or even flavored oils. Just be sure to adjust the amount based on the strength of the flavor.
- Can I color my marshmallows? Absolutely! You can add food coloring to the marshmallow mixture while whipping to achieve fun colors. Gel food coloring works best for a vibrant hue.
- What’s the best way to store marshmallows? Keep them in an airtight container at room temperature. Avoid refrigeration, as this can make them sticky.
Tips for the Perfect Marshmallows
- Use a Candy Thermometer: A candy thermometer is essential for achieving the perfect texture. Without it, you might end up with either too soft or too hard marshmallows.
- Whipping Time Matters: Ensure you whip the mixture long enough to achieve stiff peaks. This step is crucial for that fluffy texture.
- Don’t Rush the Setting Process: Allow the marshmallows to set for the full time to ensure they have the right texture.
- Coating Options: Get creative with coatings! Consider rolling your marshmallows in toasted coconut, crushed nuts, or cocoa powder for an added flavor twist.
- Use Parchment Paper: Lining the baking pan with parchment paper before greasing can make it easier to lift the marshmallows out later.
Conclusion
Homemade marshmallows are a delightful treat that brings nostalgia and joy to any gathering. With a simple recipe and a few ingredients, you can create fluffy, delicious marshmallows that are perfect for snacking, baking, or adding to your favorite hot drinks. So why not give it a try? Your taste buds will thank you!